Creating and editing Users
There are two ways to create users for your account; individually or bulk upload.
Create Users
Create Individual User
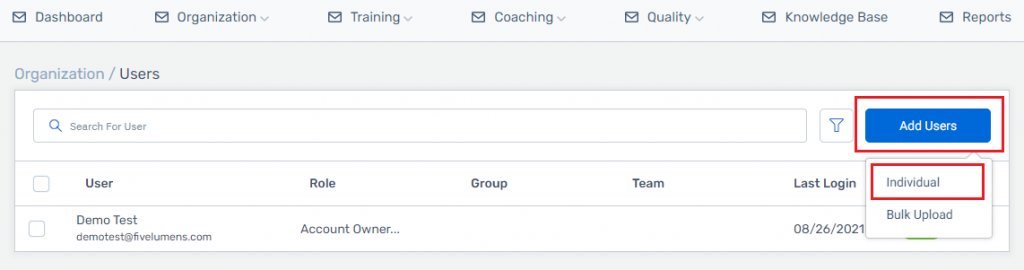
To create an individual User click on the Organization menu dropdown, click on Users, and then click on blue box titled Add User. Choose individual and you will receive a pop-up to create the User.
The pop-up has 7 required fields: First Name, Last Name, Email, Role, Time Zone, Password and Group.
- Email is used as the user name for login. This must be unique and cannot be shared between Users in your account.
- To understand what roles are available please click on this link.
- A User can only be assigned to one Group.
- The password has two options. You can check the box to send an email to the User with first time login instructions or you can select a password for the User by entering it into the password field.
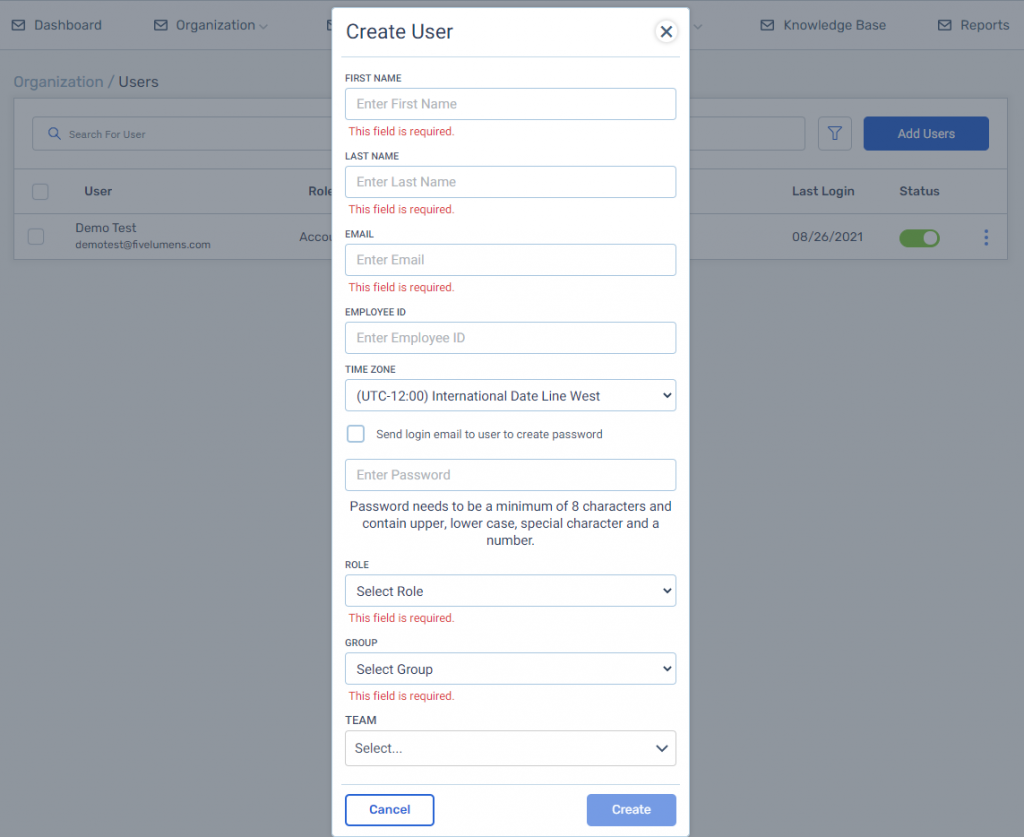
There are 3 optional fields: Employee ID, Time Zone, and Team. These can all be assigned later on through Edit User.
Bulk Upload
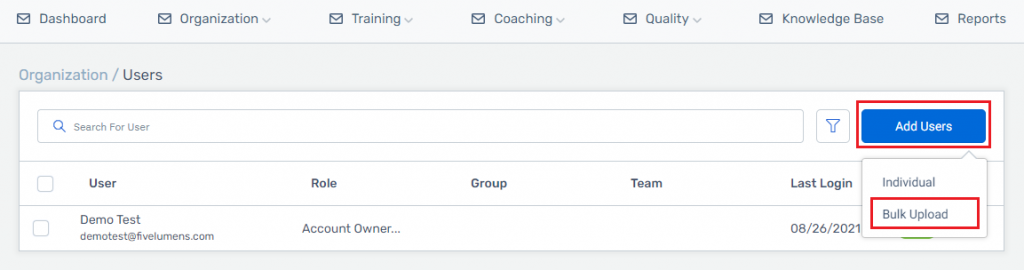
The second way to create users is through bulk upload. To bulk upload Users click on the Organization menu dropdown, click on Users, and then click on blue box titled Add User. Choose Bulk Upload and you will receive a pop-up to create the User.
You will upload the CSV file with the Users you want to Bulk Upload. Click on the Download CSV template for the format to use. There are 3 items of note for bulk upload.
- First row must always contain column titles.
- Required fields are First Name, Last Name, Time Zone, Email, Role, Group, and Password. For role, group, and team use the IDs associated with each one.
- Password is only required if not sending login emails to users.
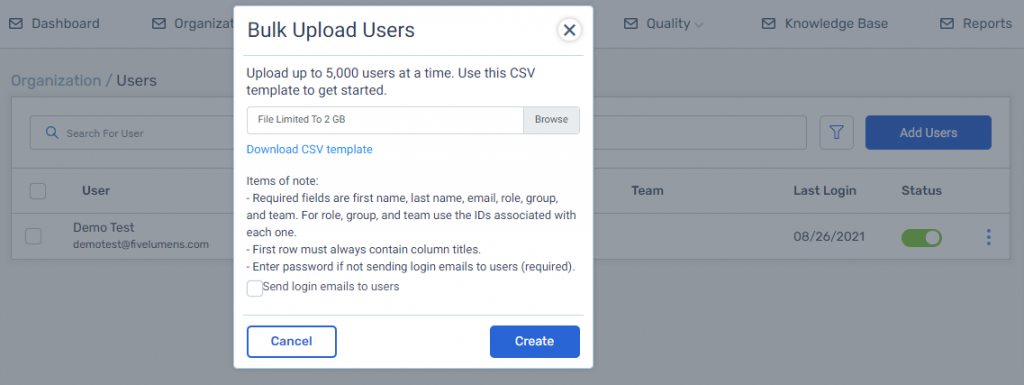
The download CSV template is below.

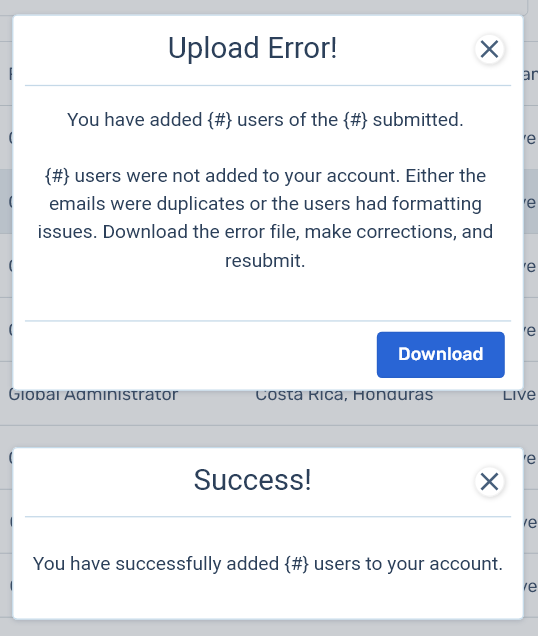
When using the bulk upload feature you will receive a pop-up after submitting the CSV file. If there are no errors, you will receive a success modal. If there are errors, you will receive an error modal with a blue button called Download. You can download the errors, make corrections and resubmit.
Once a User has been added successfully they will show up in the Users page.
Edit Users
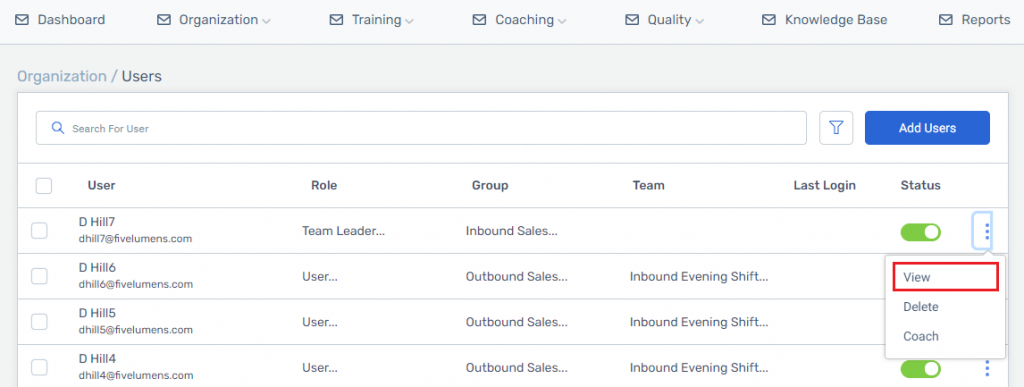
To edit a User click on the Organizations menu dropdown, click on Users, click on the action icon at the end of the row for the Users and choose Edit.
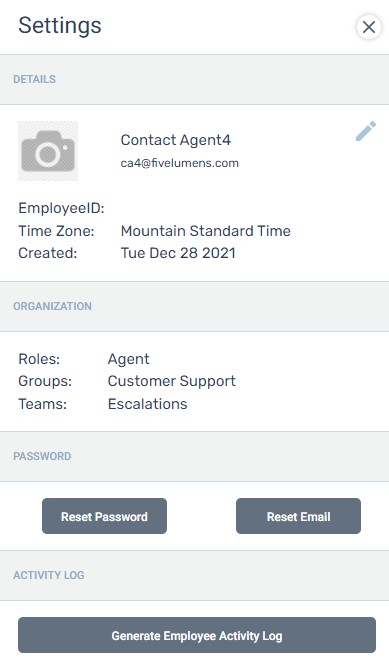
Click on the cog icon in the right hand corner and the edit user settings will appear. Click on the pencil icon, edit the User, and click save to make them final.
NOTE:
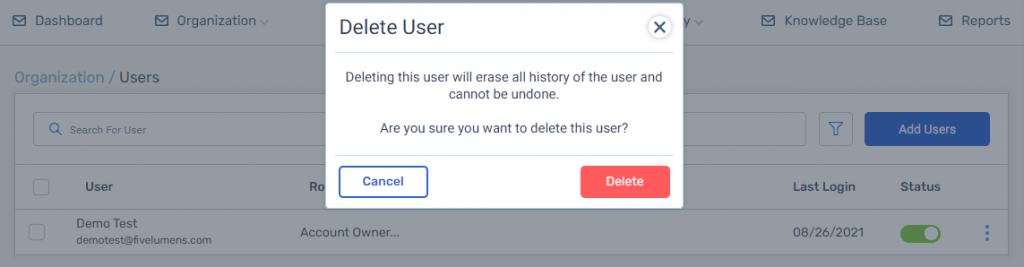
You can also delete a User by clicking on the action icon at the end of the row for that User and choose delete. Deleting a User will erase all the history of the User and cannot be undone. In this scenario, a pop-up will appear letting you know. When editing roles for your account be careful to who you give the permissions to edit your hierarchy. All deleting is permanent.