Basics for Creating a Course
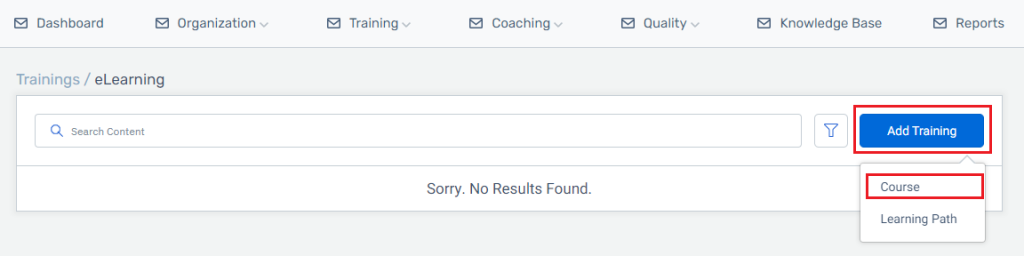
To create a Course, you should click on the Training menu dropdown, click on eLearning, and then click on blue box titled Add Training. You will see two options; Course and Learning Path. Go ahead and choose Course.
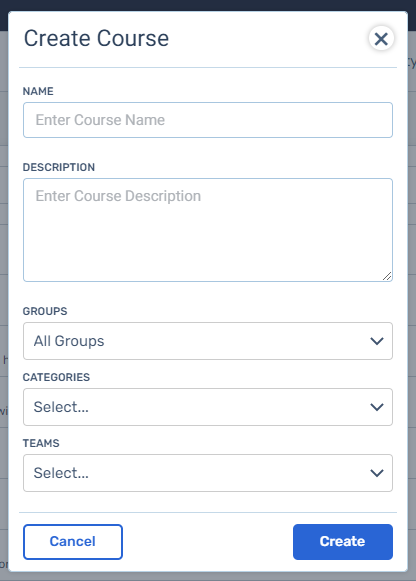
A modal will pop to create the course. The five fields are: name, description, groups, teams, and categories. You can assign multiple groups, teams, and categories to a Course.
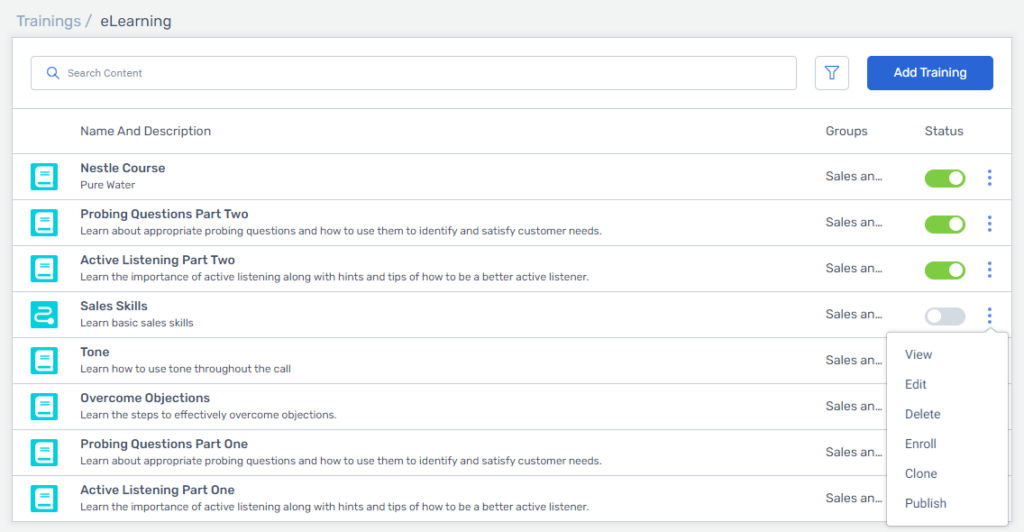
You can see your course in the list. Click on the actions icon and choose edit. You can now design your training.
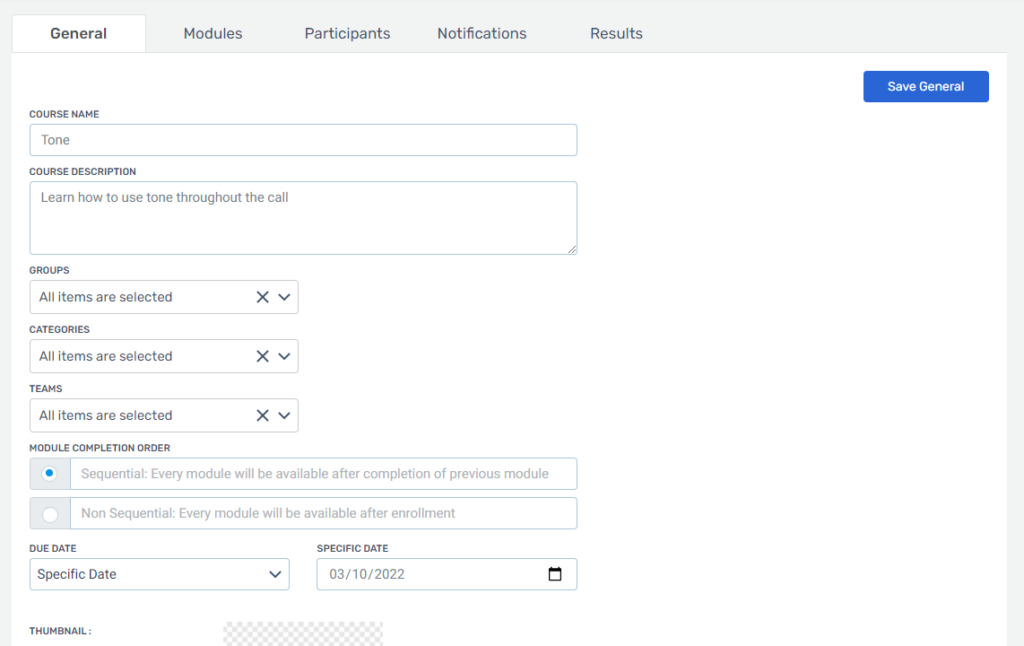
Inside the course, there are 5 tabs. Each tab covers a specific part of the Course.
General
In the general tab you can edit the details of the training. You change the following details: name, description, groups, teams, categories, module completion order, due date, and the course thumbnail.
For more details on the general tab and due dates read this article.
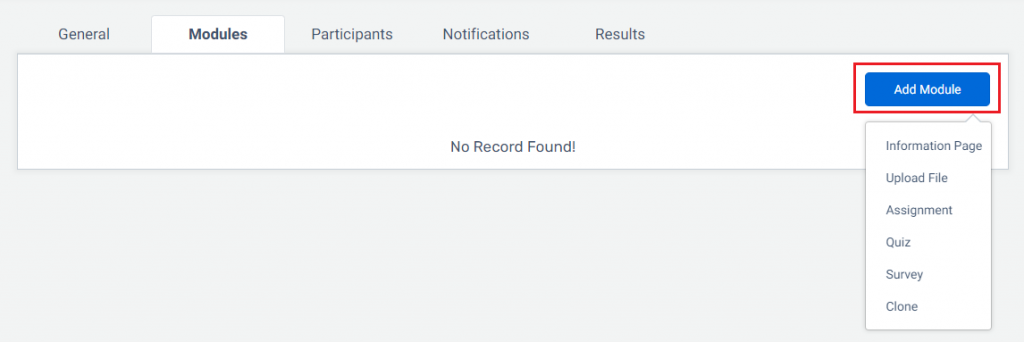
Modules
This is the meat of your training Course. There are 6 module options: information page, upload file, assignment, quiz, survey, and clone. A deeper breakdown of each module can be read in this article.
Participants
In this tab you add and remove participants for the Course. You get to this by clicking on the participants tab inside the training or click on the enroll action item for the training.
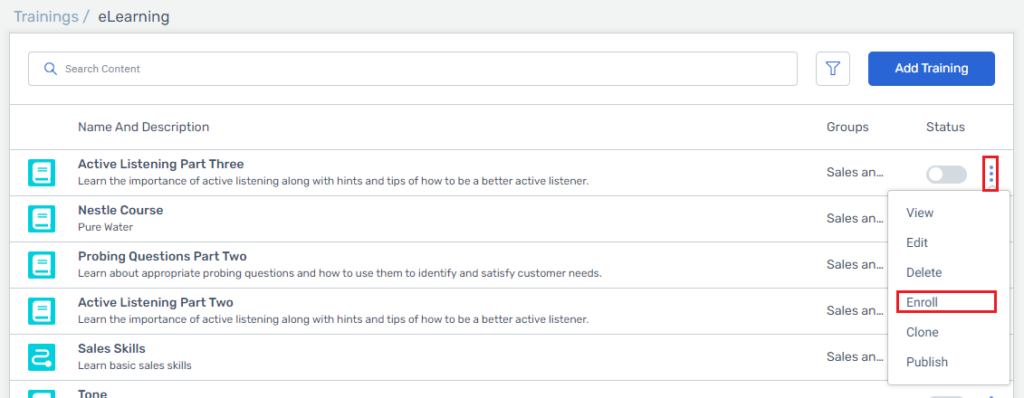
You can add a participant by clicking on the Add Participant blue button. You can remove a participant by selecting the desired users and choosing the option to delete participants. You can also read this article for more information on adding and removing participants.
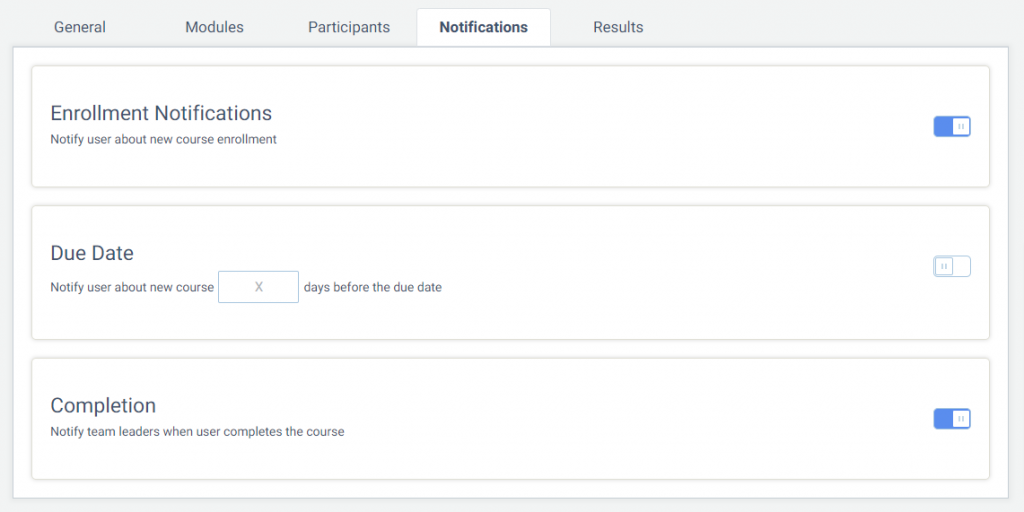
Notifications
There are 3 options in the notifications tab: enrollment notifications, due date, and completion
- Enrollment Notifications: This will notify the users that have been assigned to a training that they have been enrolled in a new training.
- Due Date: This will notify the user they have a specific number of days left to complete the training.
- Completion: This will notify the team leader that the user has completed this training.
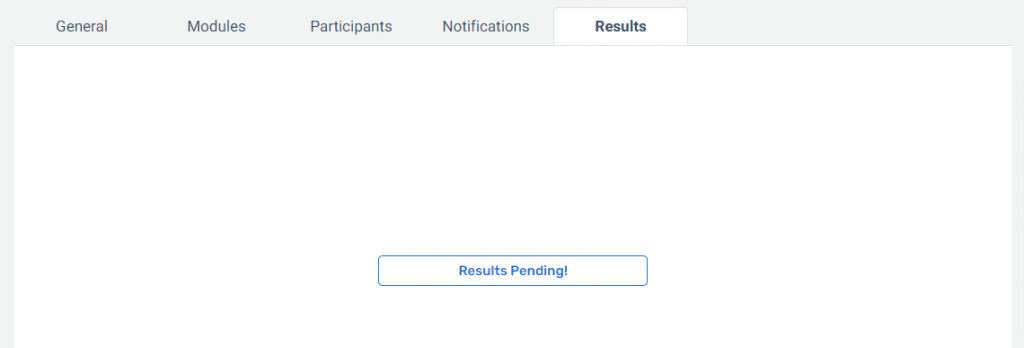
Results
After the training is published you can come back and see results in the results tab.
Publish, Status & Add to Course Library
Now that you have completed your training, you must publish it . Choose the Publish action item for the training.
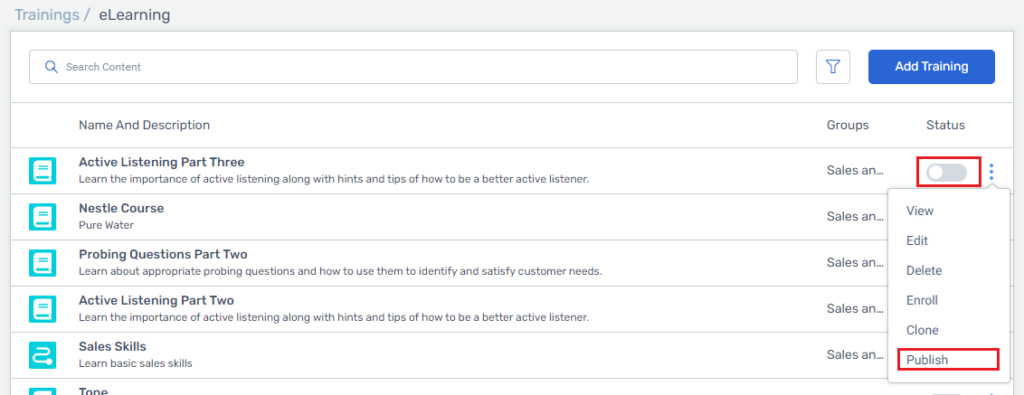
Once it is published notifications will be sent out, the training becomes active, and you add the training to the course library.
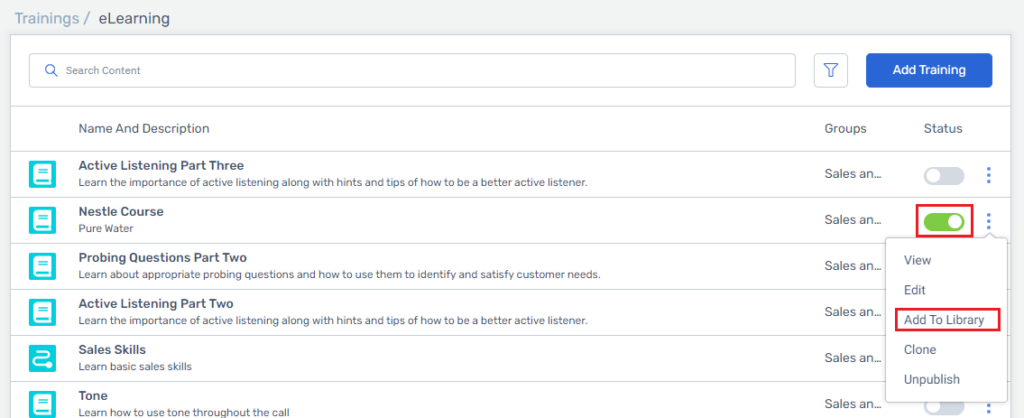
When a course is published you can edit everything but the course modules. To add or edit modules you will need to unpublish the course, make changes, and then republish the course.
Note:
If you change the status of a training to inactive, all users assigned will no longer be able to complete the training. The training will also be removed from the course library. When the status is changed to active the user assigned can complete the training and it will show up in the course library.